Get our list of basic quilting supplies for beginners! Learn what tools you need and which notions to choose to put in your quilting toolbox!
If you’re planning to make your first quilt you’ll probably want to start with a list of basic quilting supplies for beginners.
And even if you’ve been quilting for a while, you might find there are some tools and notions that can make the process much more enjoyable.
We’ve put together a comprehensive list of basic quilting supplies for beginners and beyond. These are the notions and quilting tools we pretty much can’t imagine our quilting lives without.
So whether you’re a complete newbie or want to update your sewing kit, join us as we explore the essential tools every quilter needs!
This post contains affiliate links. Learn more here.
- Basic Quilting Supplies for Beginners
- 1 – Sewing Machine
- 2 – Walking Foot
- 3 – Rotary Cutter
- 4 – Replacement Rotary Cutter Blades
- 5 – Self-healing Cutting Mat
- 6 – Quilting Rulers
- 7 – Sewing Scissors
- 8 – Seam Ripper
- 9 – Pins and Clips
- 10 – Iron and Ironing Board
- 11 – Fabric
- 12 – Batting
- 13 – Thread
- 14 – Fabric Marking Tools
- 15 – Basting Tools
- 16 – Hand Sewing Needles
- Nice to Have Quilting Supplies
- Where to buy quilting supplies for beginners?
Basic Quilting Supplies for Beginners
Here are the quilting supplies, tools, and notions we pretty much can’t live without.

1 – Sewing Machine
Since you are looking for basic quilting supplies for beginners I assume you already have a sewing machine. I won’t go into too much detail about the sewing machine itself. I started with what I had (which was a friend’s very basic sewing machine) and then upgraded when I saw I was getting serious about this whole quilting thing.
If you’re new to sewing machines, don’t worry. I know it can be a bit intimidating at first, but beginner projects can be made with basic stitches and skills. And you’ll learn more about your sewing machine with every project you make.
I do suggest you keep the manual close. Sometimes just to double-check the settings and always when you’re stuck with an error.
We also have a few tutorials that might help you with the basic things on your sewing machine:
A while back, we looked into what to look for when buying a kids’ sewing machine when Ula was looking for a sewing machine for her daughter. Most of what she found can be applied to buying a beginner sewing machine, as well. If you’re interested, read our Top Tips For Buying A Kids Sewing Machine.
What sewing machine brand?
There are many sewing machine brands out there and as you can imagine, each quilter will have their own favorite.
Here at DTQ, we are big Janome fans. We have two computerized Janome machines that we love:

2 – Walking Foot
A walking foot, also known as an even-feed foot or dual-feed foot, is a sewing machine attachment that is pretty much indispensable for quilters. So although it might feel like a bit much for a list of basic quilting supplies for beginners, I really think it can make your quilting life so much easier!
A walking foot helps you guide multiple layers of fabric evenly through the sewing machine. This comes in handy not only for machine quilting but also for sewing on binding, and many other sewing tasks. So while it’s not the cheapest accessory, it’s definitely a very very useful one.
If you have a newer machine, check if you have the accessory already in your machine kit. Otherwise, make sure you get a walking foot that is compatible with your sewing machine. Sewing Machines Plus has a good selection of machine accessories for different brands, so you might want to start there!

3 – Rotary Cutter
A rotary cutter is a cutting knife with a circular cutting blade that rotates while cutting. If you’ve only used scissors so far, you’ll be blown away by how accurately you can cut with it, and how simple it is to use.
Rotary cutters come in different sizes and handle designs. Before you buy one, try a few different ones in your hand and choose the one that feels best.
For a beginner quilting kit, I suggest you get one with a 45 mm blade. It is easy to handle and can cut through up to 6 layers of fabric.
Which rotary cutter to get?
I love our classic Olfa rotary cutter. We have two different Olfa rotary cutters (see picture above) and while we do use both of them, the classic is definitely my favorite.
Both of them have the ability to lock the blade, which is super important. But I think the yellow one is more ergonomically designed, which makes it a bit easier to cut with.
You can get both of them on Amazon:
- OLFA 45mm Ergonomic Rotary Cutter (the yellow one)
- OLFA 45mm Quick-Change Rotary Cutter
4 – Replacement Rotary Cutter Blades
Keep in mind that you’ll need to replace the cutting blades pretty often. The original Olfa blades work really well, but can get pretty pricey. I have had a good experience with generic blades from Amazon. They cut just as well as the originals – but the price tag is much much friendlier!

5 – Self-healing Cutting Mat
A cutting mat is a large surface that you’ll be using to protect your workspace when you cut. It’s basically a large surface made of self-healing material that allows you to cut on it over and over again (without damaging the surface underneath).
The material also helps you keep the rotary cutting blade in line and enables you to cut accurately.
Cutting mats come in different sizes. The size you choose depends on the size of your cutting surface. I would recommend getting the largest you have room for. We have two 24 x 36’’ mats similar to these one next to the other and it’s great having such a large surface!
Whatever you choose, it’s best to store it on a flat surface. Otherwise, these mats are prone to warping, which makes them unusable. Don’t say I didn’t warn you!

6 – Quilting Rulers
Quilting rulers are a big part of the quilt-making process. Paired with a rotary cutter and cutting mat, they help you cut accurately and quickly.
A good quality ruler will last a lifetime, so although they might seem expensive, you can almost certainly keep them forever.
When buying new rulers you want to make sure they are accurate (this seems obvious, but believe it or not, knock-off rulers can have inaccurate scales). Also, see that they have a good grip when laid on the fabric, so they don’t slide. (If you’ve got slippery rulers you can buy special non-slip stickers that will help with that.) And finally, see that the lines are thin and clear enough so you can see the fabric you’re working with AND read the numbers on the rulers.
What brand and size?
There are many different brands to choose from, but favorites among quilters are Omnigrid and Creative Grids.
That said, we have a set of no-name rulers we got from Amazon and they are also fine. However, we would prefer the lines on the rulers to be a bit thinner so it would be easier to see the exact measurement.
If you’re buying your first set, I suggest you get one long ruler (24’’ long) and one smaller square ruler (about 9’’). These are good options:
- Creative Grids Square Quilt Ruler 10-1/2in x 10-1/2in
- Creative Grids Quilt Ruler 6-1/2in x 24-1/2in
- Omnigrid 8-1/2″ X 24″ Quilting Ruler, 8-½” x 24″
There are also many value packs you can find, so if you want to have a few different rulers at hand (which you’ll never regret, I promise), this Omnigrip square ruler value pack (with 4 rulers) is a great option.

7 – Sewing Scissors
While sewing scissors are probably the most basic tool for sewists, you’ll see that in quilting most of the cutting happens with a rotary cutter.
Despite this, you’ll want to have a good pair of sewing shears at hand. Make sure you use them for fabric cutting only! We have a whole article on sewing scissors, where we talk about which ones we like (and can’t live without!).
We also like to keep small thread cutters near the sewing table. We have these crane thread cutters and just love how cute they are. They come in really handy for snipping the little threads for any sewing project. And they add a touch of elegance as a gorgeous sewing room accessory.

8 – Seam Ripper
Speaking of cutting thread, there comes a time (every day) in every quilter’s life when you have to rip some seams. And there’s this great little tool that will help you with just that – a seam ripper.
The top of the seam ripper is U-shaped with two different length tips. The longer tip is sharp and enables you to get close to the stitch you want to rip. The shorter tip has a (usually red) head that protects the upper fabric while ripping.
When you want to rip the stitch, just carefully slide the sharp tip into the stitch and carefully pull along the fabric. And that’s it.
We like our Prym seam ripper, but pretty much any brand will do – just make sure it’s sharp (ask me how I know).

9 – Pins and Clips
We use both pins and clips, depending on what we’re assembling.
When it comes to pins, we like long straight pins with pearl heads. Make sure they have sharp tips so they don’t tear the threads in your fabric.
Clips are also super useful in quilting. We use them all the time when attaching quilt binding, but also for other assembling tasks. We bought a whole bunch for cheap in a local store, but you can get them easily online, too, for example, these Clover Wonder Clips.

10 – Iron and Ironing Board
Ironing has an important role in the sewing process. It removes creases and makes a smooth fabric surface.
For a beginner, it’s fine to just use the iron you have at home. I use a basic domestic iron and it works great.

In addition to that, we have a Rowenta Pro Compact iron in the studio and it’s a super useful little thing. While I wouldn’t say you have to have a mini iron for quilting, it’s definitely a great gadget. It comes in really handy for ironing small blocks etc.
You can use an ironing board or, what I’ve seen other quilters do, is place a heat-resistant ironing mat onto a large surface. (Wool mats like this one are very popular with quilters!) This way you’ll have an even bigger surface to work with, which comes in handy when working with large quilts.
Creases can be stubborn, so it is handy to have a spray bottle with distilled water nearby. Spraying some water onto a crease can help iron it out.

11 – Fabric
I was unsure whether to include this or not. But we can’t really talk about basic quilting supplies for beginners without at least mentioning – fabric.
If you’ve ever been to a fabric store (online or real life) you know the choices are pretty much endless. Generally for quilts, 100% cotton is best. Stick to the basic quilting cotton for your first few quilts and then experiment with other options as you progress.
Which fabric brand?
There are so many fabric manufacturers and many of them specialize in fabrics for quilting. It’s impossible to say which is best. There are differences between brands – some have more drape, some are thicker, etc. The best suggestion I can give you is to try a few and you’ll see what you like working with the most.
You can get fabric by the yard which is usually the cheaper option. But for beginners especially, precut fabric (like jelly rolls, fat quarters, or half yards even) is also a great option. It eliminates the need to cut the fabric, which can speed up the whole process immensely. (Just look at our simple patchwork quilt that can be made entirely of charm packs). It also usually comes in beautifully curated bundles, so it takes off the pressure of choosing a coordinated color scheme.
You can try your local shops to find fabrics you like. But there are also many online stores. The Fat Quarter shop has a wide selection and is a great place to start!
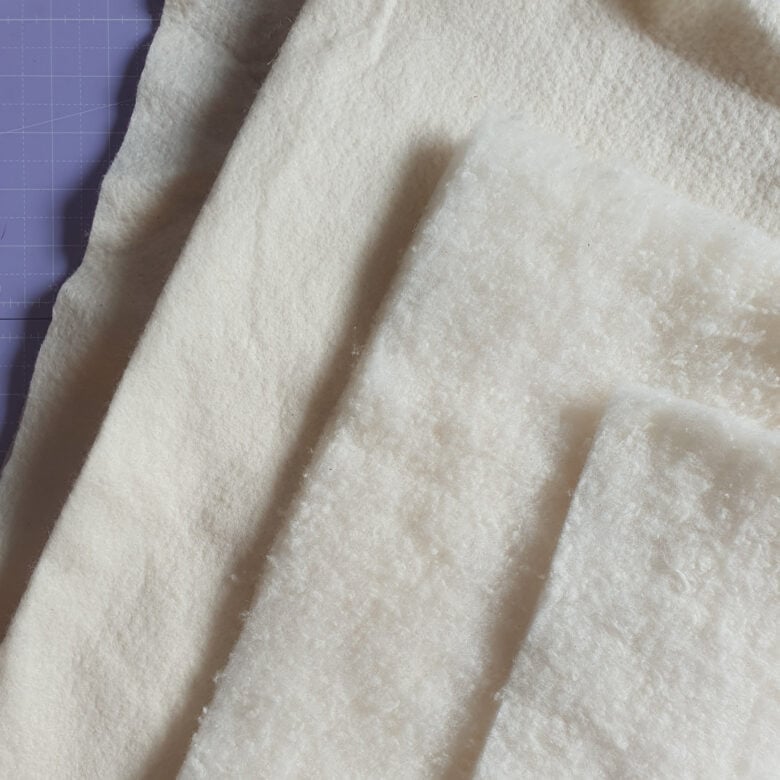
12 – Batting
Of course, to make a quilt from start to finish, you’ll also need batting! Batting is the middle layer of a quilt sandwich, the layer between the quilt top and the backing fabric. The batting provides warmth, thickness, and loft to the quilt. There are various types of batting materials available, including cotton, polyester, wool, bamboo, and blends of these materials.
We talk about all these different options in our Quilt Batting Guide.

13 – Thread
Of course, you can’t sew without thread. We have an article where we discuss all about quilting thread, but generally, I would suggest either a 100% cotton thread all a good quality all-purpose polyester thread. I’ve had good results with both.
But the emphasis is on quality – there is such a thing as bad thread. It will break, cause tension problems on your machine and all kinds of icky things. So trust me on this one and just stay away from it.
We use Guttermann poly thread for most of our piecing. Aurifil 50 wt is also a great option if you prefer a 100% cotton thread.
Get a big spool of thread in a neutral color (we like to use some kind of off-white) and you should be good to go for most projects.

14 – Fabric Marking Tools
When it comes to fabric marking tools there are different options. I think in time every quilter figures out what works best for them. For us, it’s the following:
First, chalk pen with replaceable cartridges – we use this Prym Chalk Pen & Cartridge Set. I like that it can make pretty accurate markings. And above all, I can be sure the chalk will come out every time. You do need to sharpen the chalk pretty often, but so far, this is the best option we’ve found and it works well for us.
Second, a Hera marker. If you’re afraid of marker residue on your fabric (which we always are and you can guess why), a Hera marker is a great solution. It’s typically made of plastic or another smooth material and has a somewhat sharp rounded end. When you press it against fabric, a crease is formed, creating the ultimat non-permanent mark! We use it for marking quilting lines all the time and wouldn’t be without.
Finally, something that is not technically a fabric marking tool, but can be used as one – painter’s tape. You can use painter’s tape to mark quilting lines – when you’re done you just rip it off and you don’t need to worry about any marking residue. (BTW, it also comes in handy when making a quilt sandwich!)

15 – Basting Tools
If you’re planning to quilt your quilts on your sewing machine, you’re going to need some supplies to make the quilt sandwich (i.e. attach the three layers of your quilt together).
There are different ways you can do this and we talk about this in our quilt basting tutorial.
Our preferred method is pin basting which requires – you’ve guessed it – basting pins. Basting pins look a lot like regular safety pins, but are slightly curved. This makes it easier to slip through the layers of the quilt sandwich when basting.
The other popular option is spray basting. We don’t really do that, so I can’t recommend the best option. But the 505 basting spray seems to be a quilters’ favorite.
16 – Hand Sewing Needles
Even if you don’t plan to hand-quilt your quilts, you’re going to need some basic hand-sewing needles. Whether it’s for sewing binding on a quilt or for making small corrections, a set of hand-sewing needles should always be on hand.
You can start with a basic needle set like this one and then see what you prefer and add it to your toolkit as you go along.
Nice to Have Quilting Supplies
If you’re just starting out, I suggest you stick to the basic tools listed above. However, as you progress in your quilting journey you’ll see there are different tools and gadgets that can help you at different stages of the sewing process.
I won’t go into detail here, but if you’re looking to add some ‘fancier’ things to your sewing kit, browse through our advanced quilting tools and gadgets in our gift guide for quilters.
Where to buy quilting supplies for beginners?
As you can imagine, there are many options where to buy quitting supplies for beginners and beyond. We buy our tools from a variety of shops, both online and in person. Here are some ideas:
- Local Fabric or Craft Stores: Visit local fabric stores or craft shops. Many of them have dedicated sections for quilting supplies, including fabrics, batting, threads, and basic tools. It’s a great way to support smaller businesses!
- Chain Stores: If you’re from the US, large retail chains like Joann Fabrics, Hobby Lobby, and Michaels often have a variety of quilting supplies. They also offer discounts and coupons which can save you lots of money if you plan your purchases a bit.
- Online Retailers: Of course you can get most quilting supplies online, as well. We order from Amazon many tools and notions, mostly because of the price. What I like about online shopping is the product reviews section, so that’s a plus.
- Quilting Shows and Events: If you get a chance, attend quilting shows, fairs, or events in your area. There are usually vendors selling quilting supplies, and you may get some great unique notions to add to your toolbox!
- Local Sewing Machine Shops: For tools and accessories compatible with your sewing machine, turn to your local sewing machine shop. Or if you prefer online shopping, Sewing Machines Plus has a great selection of sewing machines and accessories for many different brands.
There you go, a list of basic quilting supplies for beginners. It might feel like it’s a lot and it can definitely add up. But believe me, you’ll never regret investing in good quality tools and notions!
Is there anything we missed that you think is absolutely essential? Let us know in the comments below!

Finish Your Quilt Effortlessly
Quilt Geek calculates every measurement you need, so your quilt turns out perfect every time.
START YOUR 7-DAY TRIAL FOR $0!
Cancel anytime.


About The Author
Barbara | Designed to Quilt