Learn all about sewing binding on a quilt with our in-depth hands-on tutorial. We’ll show you how to calculate binding, make binding for a quilt, and how to finish binding!
Sewing binding on a quilt is the last step in the quilt-making process. It’s the icing on the cake and a well-made quilt binding can really add that professional-looking finish to your quilt.
In this tutorial, we’ll guide you through all the required steps to sewing binding on a quilt. You’ll never have to look for a different tutorial again!
What Type of Quilt Binding to Use?
Before we look into how to sew binding on a quilt let me take a moment to go through some of the basic differences between different types of binding.
Straight Grain Binding vs. Bias Binding
There are two types of binding based on the way the binding strips are cut: straight grain binding and bias binding.
Straight grain binding: the strips are cut along the grain of fabric, usually crosswise (from one selvage to the other). Straight-grain binding strips work well for rectangular quilts, so if you’re not working with curves, this is your go-to. This is also the method we describe in the tutorial below.
Bias binding: the strips are cut at a 45-degree angle. The bias cut makes the binding strip more stretchy and therefore more flexible. This makes it perfect for binding curved edges.
We talk about bias binding extensively in How to Make Bias Binding for Quilts, so if you’re dealing with curves or strange shapes, I suggest you head over there. In this tutorial, we’ll be focusing on straight-grain binding.
Single Fold vs. Double Fold Binding
The other fancy expressions you’ll often hear when talking about quilt binding are single fold and double fold binding.
Double-fold binding is a strip of fabric that has been folded in half before being attached to the quilt. It tends to be sturdier and has a longer lifespan, so this is what we always use for our quilt. This is also what we’ll use in this tutorial
Single fold binding is when you use a single flat fabric strip and attach it to the quilt. It’s great to use with smaller projects (like mug rugs) because it adds less extra material to the project.
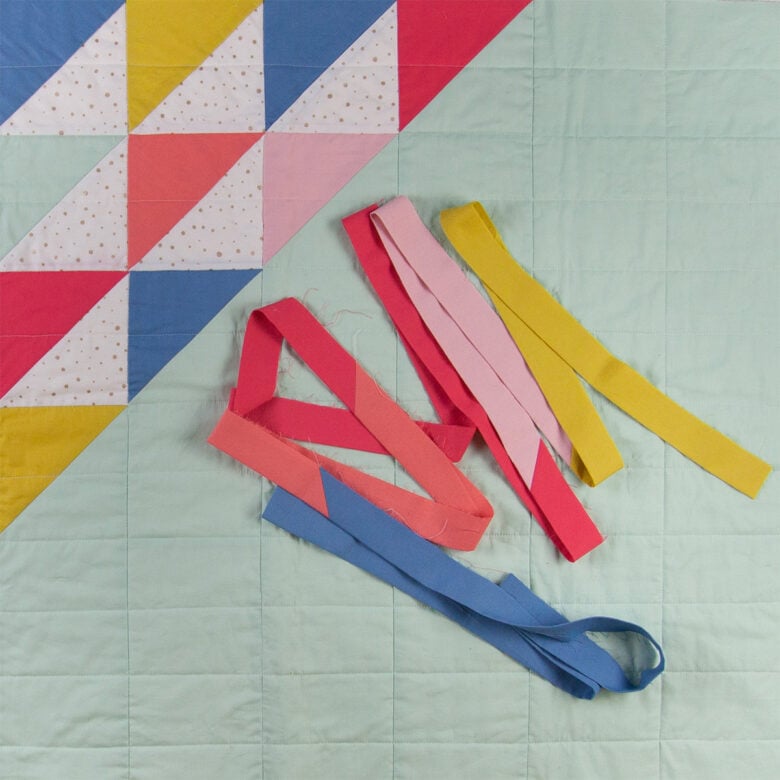
Best Binding Fabric
A binding strip is usually made from the same fabric as your quilt top (quilting cotton or something similar).
When choosing the color or print, this really depends on the effect you want to achieve.
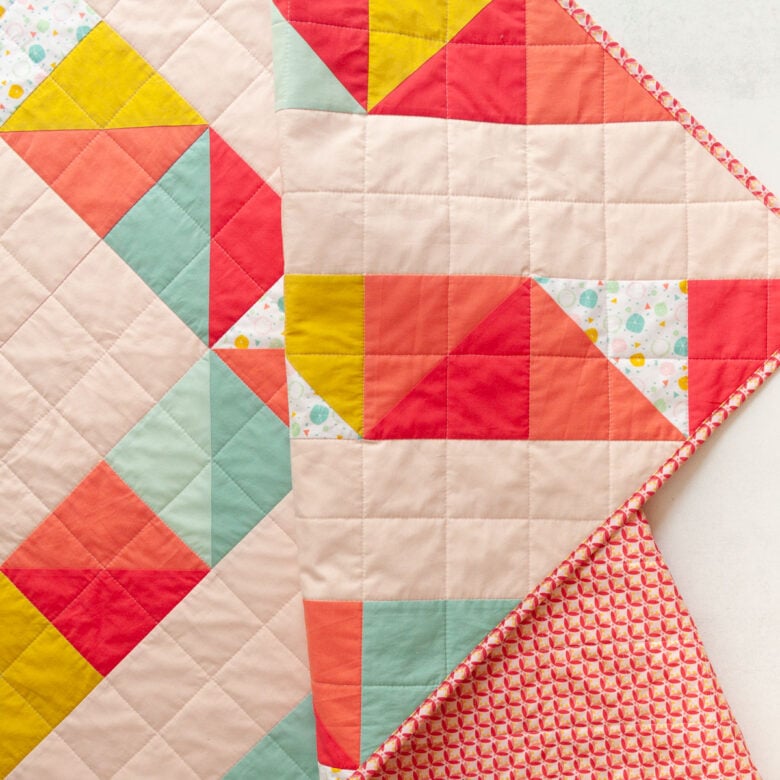
For example, you can use a fabric that you used in your quilt top to create a harmonious look. Alternatively, you can use the backing fabric to visually tie the back and front of the quilt together, like we did in our Mirror Maze quilt:
What I really like (and we often do around here) is using the binding to create an accent to the quilt, like this stripey binding in our Underlined quilt:

There is no right or wrong and it’s really up to you to decide what look to go with!
Now that we know the basics, let’s finally look into sewing binding on a quilt!
Quilt Binding Tools and Materials
You’ll need the following tools and materials for sewing binding on a quilt:
Tools:
- Sewing machine
- Walking foot (recommended)
- Pins or clips
- Quilting ruler
- Rotary cutter
- Iron & Ironing board
Materials:
- Finished quilt top (quilted and squared, edges are left raw)
- Binding fabric (we’ll explain how to calculate the required amount in a bit)
- Thread (we usually use Gutterman all-purpose polyester thread)
STEP 1: Calculate Quilt Binding
The first step is to calculate quilt binding. You can do this the old-school way (Option A) or with some help from charts and calculators (Option B).
Option A: Calculate quilt binding yourself
1 – Choose the desired binding width
First, you’ll want to decide on the width of the binding strip.
The standard choices are 2 ¼” or 2 ½”, so if this is your first time making quilt binding you can’t go wrong with either of those. With time you’ll see what width works best for you.
We prefer a narrower look, so most of the time we make 2 ¼” binding strips.
2 – Calculate the binding length
Measure the dimensions of the finished squared quilt sandwich.
Now, calculate the perimeter of the quilt (2x width + 2x length of the quilt) and add an extra 10-12” to account for joining the ends of the binding strips.
Example
Quilt dimensions: 28” x 37”
Quilt perimeter: 2x 28” + 2x 37” = 130”
Extra 10 inches for joining the ends: 130” + 10” = 140”
I need 140” binding for my quilt.
3 – Calculate the required number of WOF (width of fabric) strips
Simply divide the final binding length by the width of the fabric (usually 42”). Round up the result to the nearest whole number.
Example
The final binding length: 140”
Number of strips needed: 140” : 42” = 3,3 — rounded up to 4
I need 4 WOF strips to make my binding.
4 – Calculate quilt binding yardage
To get the quilt binding yardage, multiply the number of WOF strips by the chosen width of the binding strip.
The number you get is in inches, so to get the result in yards divide it by 36. Round up the number to the closest 1/8-yard increment to get the final required yardage for your binding.
(I suggest buying a couple of inches extra to account for cutting mistakes etc.)
Example
Number of strips needed: 4
Chosen binding width: 2 ¼ ”
Yardage in inches: 4 x 2 ¼ ” = 9”
Yardage in yards: 9” : 36 = ¼ yd
I need 1/4 yd. fabric to make my binding.
Option B: Use Quilt Geek, our quilting calculator app
Of course, the easiest way is to just use our quilting calculator app! You’ll be doing these calculations over and over again, so just imagine how much time Quilt Geek is going to save you!
Just plug in the numbers and let Quilt Geek do the rest in seconds!

Quilt Geek’s handy Quilt Binding Calculator calculates everything you need to make perfect binding: the required length, the number of WOF strips needed, and total yardage (depending on the width of the fabric you are using).
Learn more about Quilt Geek’s 20+ calculators and charts here or get started right away:
Option C: Use our quilt binding size chart
If you prefer to have a cheat sheet printed out, we’ve got you covered, as well. In fact, even though we obviously have Quilt Geek installed on our phones and use it all the time, we have this chart printed our, as well. It’s great as a quick reference when we’re just estimating the yardage for future projects.
Our handy quilt binding size chart tells you the total binding length, the number of WOF strips, and the yardage needed to bind the quilt for 10 standard quilt sizes.

You can get it in your inbox for free by simply signing up for our newsletter below:
STEP 2: Make Binding Strips
Before we can actually start sewing binding on a quilt, we need to make binding strips. Here is how we do this.
1 – Cut the required number of WOF strips from your fabric.

2 – Lay two strip ends right sides together at a 90-degree angle. Use a straight pin to keep the strips in place. Sew a line diagonally from the left corner to the right, as shown in the picture. (If you want, you can draw a line to follow using a fabric marker.)

3 – Trim away the excess fabric with a ¼” seam allowance (meaning ¼” away from the sewn line).

4 – Trim away the dog ears (the little triangles coming from under the strip).

5 – Open the seam with your fingers to distribute the seam bulk. Press open.

6 – Sew the remaining WOF strips using the same method to get a long continuous fabric strip.

7 – Press the binding. Fold the binding strip wrong sides together along the entire length and press. I like to first fold and press with my fingers before iron-pressing the entire strip.
STEP 3: Sew Binding on the Quilt
With all these prep steps out of the way, we can finally start sewing binding on a quilt. We’ll show you what we find is the best method that produces a nice clean finish and is also beginner-friendly.

1 – Attach the binding to the back of the quilt
First, make sure you have enough binding. (If you followed our tutorial above, you should have enough.) I like to audition my binding strip by placing it along the perimeter of the quilt and making sure I have about 8-10 inches of overage.
Then start attaching the binding. We’ll begin by attaching the binding to the back of the quilt. I like to start at about the middle of the chosen side of the quilt (it doesn’t matter which side you start with, as we’ll sew all around it anyway). Leave about 8 inches of the binding strip at the beginning, as shown in the picture.
Align the raw edge of the binding with the edge of the quilt. If you wish, you can use clips to attach the binding along the first side of the quilt (do not go around the corner just yet).

2 – Sew the binding
Place the quilt under the walking foot and lower the foot. Lock the stitch and sew along the edge of the quilt with about ¼’’ seam allowance (if using a 2 ¼’’ binding strip). I like to use a shorter stitch length here – about 2.0.

3 – Fold at the corner
To make a perfect corner, stop sewing a ¼ inch before the end of the side. To know exactly where to stop, you can mark a ¼ inch from the edge you’re approaching with a pin. When you are at ¼ inch before the edge, stop sewing and lock the stitch. Fold the binding over the seam to the right (see pic 3 above). Then, fold the binding a second time back to the left, so the fold is perfectly aligned with the edge. Clip the fold to keep it in position.

4 – Sew along the next side
Now, rotate the whole quilt counterclockwise. Start sewing a 1/4 inch from the right edge and 1/4 inch from the top (the point I am showing with the marking pen above). It’s important that you start sewing just right next to the 45-degree folded edge underneath. Make sure you are not sewing through the folded multiple layers of binding!
Lock the stitch at this point and sew a 1/4 inch from the edge towards the next corner. Repeat this method on the other 3 corners.
Read our tutorial on how to get perfect binding corners for some more mitered corner tips!

5 – Mark the connecting point
Stop sewing about 10 inches before you reach the starting sewing point (so you leave about 10 inches between both sides of the binding). Fold the ends of the binding and lay them with the edges neatly along the side of the quilt, leaving ¼’’ between them. Press with your fingers.

6 – Connect the binding ends
Take a pin, open the left end of the binding, and put the pin through the intersection of the creases (I marked the creases with blue lines, so you can see them a bit better). The pin will go through on the wrong side of the fabric and come out on the right side. Now, grab the right end of the binding and again, slide the pin through the crease intersection. Only this time, start from the right side of the fabric and come out on the wrong side.

7 – Sew the binding ends together
Lay the connected binding tails neatly under your quilt, as shown in the picture. Make sure the binding strips are opened exactly like shown in the picture: the strips are laid at a 90-degree angle right sides together and there’s no twisting.
Align the creases so you get a neat cross shape. Pin the binding strips together on both sides of the center pin, and remove the center pin.
Sew diagonally from one corner to another (along the green line in the picture) and make sure that you hit the center mark.

8 – Finish the seam
When you’ve sewn the diagonal seam, you’ll get something like what you see in the first picture above. Now, carefully cut away the tails of the binding strips (the excess length of the binding) with a ¼’’ seam allowance. Always double-check that you’re cutting on the correct side of the seam. Cut away the dog ears (the little triangles coming out of the binding). Press this connecting seam open.
Now, align the binding strip with the quilt edge. Sew the remaining unattached part of the binding to the quilt. Don’t forget to lock stitches at the beginning and at the end of the seam.
STEP 4: Finish Binding
As with most things in quilting, there are many ways you can go about sewing binding on a quilt. After you’ve attached the binding to your quilt, the next step is to wrap the binding over the edges of the quilt to the other side and tack it down.
Generally speaking, there are two ways to do this.
Option A: Machine sew the binding to the front of the quilt
This is the method we use for 99% (OK – all) of our quilts. Its main advantage is that it’s fast (and who doesn’t love fast when there are new quilt projects to be made). And if done right it can produce a very professional-looking finish.
By first sewing the binding to the back and then wrapping it to the front, you have full control of where you’re sewing. Which is particularly important for beginners.
There are methods that give you an even cleaner finish (like our invisible stitch-in-the-ditch machine binding), but they have to be done more or less perfectly to look good.
Here is how to finish binding by machine:

1 – Press the binding
Open the binding and gently press with a hot iron. This allows for the binding to lay flat and wrap nicely around the edges.

2 – Wrap the binding over
Fold the binding over to the front of the quilt along one edge of the quilt. Clip or pin it in place. Miter the first corner, so you get a nice 45-degree fold in the corner.
I like to do this one side at a time – I prepare one edge and corner, sew around it, and then prepare the second side and corner (with the quilt still in the sewing machine), sew around it, and so on.

3 – Begin sewing the binding to the front
We’ll sew it in one single go, so one stitch along the entire perimeter of the quilt.
I like to use the same stitch length for this stitch as I did for the machine quilting (usually about 3.0).
Place the quilt (with the front facing upwards) in your sewing machine and lower the presser foot. You want the stitch to go on top of the binding strip, right along the inner edge of the binding. I like to go pretty close to the edge. This way I get a neat finish on the front, while the stitch at the back of the quilt comes just along the binding.
Sew along the first side of the quilt. Continue sewing until you almost reach the corner.
4 – Miter the corner
Before you hit the corner, prepare the corner fold or double-check if the corner fold is still in place. When you reach the corner, stop sewing, but don’t lift the needle. Leave the needle inside the quilt, and just lift the presser foot. Now slowly rotate the quilt (with the needle still inside the quilt) and reposition the quilt, so you can continue sewing along the next side.
5 – Sew all around
Repeat until you’ve sewn all the way around the perimeter of the quilt. Secure the stitch and give yourself a high-five, you’ve just finished your quilt!
Option B: Hand sew the binding to the front of the quilt
The other option for finishing quilt binding is to hand sew it to the other side of the quilt. I say the other side – and not the front – because with this method quilters usually begin by machine sewing to the front (which produces that super clean finish on the front). They then wrap the binding over to the back and hand-stitch it.
Many quilters swear by this method because they say it produces the closest-to-perfect finish. I’ll be completely honest with you – we actually prefer the machine binding method explained above. But if you want to add that added personal touch hand sewing might be the way to go.
Tips for a Professional-Looking Quilt Binding
Here are some tips to help you achieve that crisp professional-looking finish.
TIP 1: Use a walking foot
If you’re serious about quilting, you’ll want to get a walking foot for your sewing machine. It’s a bit of an investment, but oh so worth it!
If you’re interested in how exactly it works, you can read all about the walking foot in our article. But in short, the beauty of it is, it helps you feed multiple layers of fabric through the machine. This means you don’t have to deal with puckering and shifting, which can happen a lot otherwise when binding a quilt.
TIP 2: Pin pin pin! (Or clip clip clip!)
After you’ve bound a few quilts you’ll be able to skip this step and pin less (or not at all). But when I first started quilting, I had the dreaded wavy binding happen to me more than once. I found that it was happening because I was stretching my binding strip as I was sewing it. And the easiest solution was to pin everything in place before sewing! Easy!
I have some other tips on how to fix wavy binding, so you might want to take a look into that, too!
TIP 3: Go slow!
I cannot stress this enough. Sewing binding on a quilt is intricate work. Take your time and go slow. This will enable you to keep a steady course and prevent (too many) wonky stitches.
There still might be wonky stitches and that’s ok. But there will be less of them, which is what I call success!
TIP 4: Pay special attention when mitering the corners
Mitered corners are probably 90% of what makes binding look really good. (I’ll be honest, I have no idea where I’m getting these numbers, but you get my point. They’re super important.)
That’s why we recommend paying special attention when mitering corners. Go slow and try to be as accurate as possible. For more information, read our article on how to get perfect mitered corners!
TIP 5: Go easy on yourself
Listen, sewing binding on a quilt is no small feat. And yes, achieving that professional finish is something to be super proud of. But it’s not the end of the world if it doesn’t happen. It takes practice and experience. And even with that, there are still times, when your binding will not look as good as you want it to.
That’s totally fine. Finished is better than perfect. You’ll have plenty more opportunities to practice and get that ‘perfect finish’! We’re super proud of you already!
Advanced Quilt Binding Techniques
Depending on what type and shape of quilt you are trying to bind, there might be additional advanced techniques you will need to employ.
We have a whole variety of Quilt Binding Tutorials you can check out for more specific quilt binding needs:
Also, make sure you check out our handy quilting calculators for straight grain and bias binding:
Here you go, my friend! I think you now know everything you need to know about sewing binding on a quilt. Remember, if you’ve got any questions whatsoever, we’re here for you! Ask in the comments below and we’ll be happy to help!

Save this post to Pinterest so you can read it later!
Click on the button below to save this pin:

Finish Your Quilt Effortlessly
Quilt Geek calculates every measurement you need, so your quilt turns out perfect every time.
START YOUR 7-DAY TRIAL FOR $0!
Cancel anytime.


Thank you this chart is so very helpful! I still need a good standard way to join my binding ends seamlessly while sewing on my binding to finished quilt. Do you have a video to help me with this process? Many thanks!
Please disregard my previous post as I found your next steps to binding and it worked out lovely! Thank you!
That’s great, Tracy! Enjoy your new quilt 🙂
Hi am new in quilting and love to learn more, hope I can get more tips from your blog. 💕☺️
Hey Laura! It’s awesome that you’re getting into quilting! If you ever have questions or need a tip, feel free to reach out, we would love to help. Happy quilting! 🙂
Thank you so much for this! This is binding explained that I understand can follow easily, but I do have one question (and it’s gonna seem like a dumb one)…I noticed one instruction was not to sew around the corner on the back of the quilt, but sew through the corner on the front of the quilt. May I ask why this is? I think I know the answer, but wanted a better explanation from an expert. 🙂
Hi, Amy! The reason we don’t sew around the corner on the back is so that we can then fold (wrap) the binding over to the other side and make that mitered corner. We actually noticed now that we had the wrong picture right at this step – so perhaps that’s why the instructions were kind of confusing. We hope this helps and explains your question – otherwise let us know!
I have just started sewing again after 25 years, Im doing small projects. I need to learn how to bind a potholder using binding i make. I usually do 8×8 potholders, What width should I make the binding and seam allowances i need to use. I know you press the binding in half and press and i know how to make a miter. Trouble Im having is when i sew the potholder on the front the back of the potholder looks awful. The binding is different size. Do you have any easy hints,.
Hi, Pat. If you’re getting a different width on the back, you need to adjust your seam allowance when attaching the binding. We prefer a narrower binding, so we use 2 1/4” strips (folded and pressed in half). We use a generous 1/4” seam allowance (towards 5/16”) and it usually works our great. Different things come into play here, so I always suggest doing a test piece first with the same materials you’re using for your project: sew binding on with your chosen seam allowance for about two inches and stop the stitch. Then fold the binding over to check if the width you’re getting at the back is the same. If you see you’re getting wider binding on the back, you’ll need to sew a bigger seam allowance. If you’re getting narrower binding on the back, you’ll need to sew with a smaller seam allowance.
Thank you for the very clear description of the binding process. I always sew my quilt bindings onto the front then stitch in the ditch for a cleaner look. I find that the iron is my friend – I iron it down before stitching. As I stitch in the ditch, I use my fingers to be sure the binding on the back is being caught by the sewing. Go slow and steady! 🙂
Slow and steady wins the race! We have a tutorial for a process similar to what you’re describing: https://designedtoquilt.com/invisible-machine-binding/ – in case anyone else reading this is curious about how it’s done. But thanks for your tips, we’ll try to remember trying them next time we do binding!
Nice instructions but you shouldn’t use polyester thread with cotton fabrics. The polyester can tear through the cotton fibers. Always use the same type of thread as the fabric.
Thanks so much for your comment! We totally get the traditional advice, but we’ve been using high-quality polyester thread with cotton fabrics and have been really happy with the results so far. Always love hearing different quilting experiences — that’s what makes this community so great!
How do you know where to sew the long end pieces together so that it will fit your quilt at the very end of the process? I’m afraid I will sew them to short or sew them to long. How do you tell where to sew them so they will fit your quilt exactly?
Hi Phyllis,
take a look at step 3.5 – Mark the connecting point in our instructions. When you fold the binding ends and lay them along the edge of the quilt, leave a ¼’’ gap between the two ends. That little gap is the key — it gives you just the right amount of space so that when you sew the ends together, the binding will fit the quilt exactly without being too short or too long.
Thank you for this post. I always dreaded the final step to joining the binding on my quilts, but you made it relatively painless! Pictures are so helpful!
That’s great! Here’s to many more bound quilts to come! 😄