Finally! Learn what ‘cut on the bias’ means and get some amazing tips for working with bias edges to take your quilting to the next level!
Today we’re diving into the world of bias. Bias in fabric, that is.
If you’ve ever followed a quilt pattern, there are good chances you’ve come across the expressions ‘cut on the bias’ or ‘bias edges’. So what does it mean?
Join me as I explain what is a bias in sewing and more specifically – quilting. And don’t miss some great tips for working with bias edges at the end of the article!
What is bias in fabric?
To really understand the concept of bias, you need to have some basic understanding of fabric and how it’s made.
There are two basic ways textiles can be created resulting in two types of textiles: wovens and knits. When talking about the bias in fabric, one can only be referring to woven textiles. But for you to understand the bias cut, let me quickly explain the difference between the two types.
Difference between wovens and knits
Woven fabrics are textiles made by interlacing two sets of yarns at right angles to each other, typically referred to as warp and weft. The warp threads run vertically or longitudinally (pink in the illustration), while the weft threads run horizontally or transversely (yellow in the illustration).

Woven fabrics come in various types and can be made from different materials, such as cotton, linen, wool, silk, synthetic fibers like polyester, and blends of various fibers. Quilting cotton is an example of woven fabric.
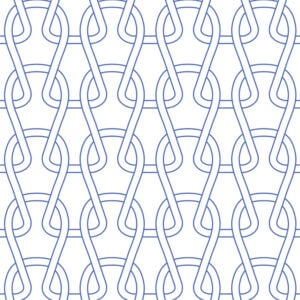
Knits, on the other hand, are made by interlocking a single thread in a series of connected loops. The interlocking loops give knit fabrics a stretchy and flexible quality, in contrast to the stable and structured nature of woven fabrics. Examples of knit fabrics include jersey, rib knit, and interlock, among others. They are commonly used for making T-shirts, comfy dresses, and other pieces of clothing we wear a lot these days.

Cut on the Bias Definition
As I’ve said, when referring to cutting on the bias means you’re talking about woven fabrics, such as quilting cotton.
Bias in fabric refers to the direction of the fabric that is diagonal to the straight grain – the warp and weft threads.
As I’ve explained, in woven fabrics, the warp threads run vertically, and the weft threads run horizontally. The bias, however, runs at a 45-degree angle to the warp and weft.
In the illustration below, the bias is indicated with the green dashed line.

And that is the whole secret to bias in fabric.
OK, that’s not the whole secret – because obviously, there must be something special about the bias cut. A reason why you would even want to cut on the bias and complicate your life with those diagonals. And you’re right. There is. Let me explain.
Why do you cut on the bias?
Remember how I said woven fabrics are stable and structured? Well, the interlacing warp and weft threads are what gives them stability – but only in the direction of the threads.
If you try to pull a piece of fabric along the bias, you’ll see it has much more stretch in this direction compared to pulling along the straight grain. You can see clearly how much more give the fabric has at a 45-degree angle in the pictures below.

In the first picture, Barbara is pulling along the straight grain (or weft, more specifically) and the fabric barely stretches. In the second picture, she’s pulling at a 45-degree angle – i.e. along the bias. The fabric stretches significantly more.
This is the property we’re after when using the bias cut. When you cut or sew fabric along the bias, it creates a stretchy, flexible, and often drapey quality because you are cutting across the natural grain of the fabric.
Bias Cut in Garment Sewing
Sewists often make use of this stretchy quality when making garments. Knowing how cutting on the bias affects the properties of the fabric, this makes total sense, right? Especially for pieces of clothing that you want to flow and drape around your body.
When you hear that a garment is cut on the bias it simply means that the garment pattern pieces were placed diagonally on the fabric. (And not along the straight grain of the fabric.)
You’ll often come across bias-cut skirts and dresses which known for their fluid and graceful drape. The natural stretch of bias-cut fabric allows the garment to hug the body’s curves and move with the person wearing it, creating a flattering and elegant silhouette.
When to Cut on the Bias in Quilting
But of course, this is a quilting blog. So what we really want to know here is when the cut on the bias comes in play in quilting.
Well, there are different situations where you WANT your fabric to be cut on the bias. But there are also situations where you don’t want it cut on the bias, but you don’t really have a choice. Let’s take a look at both.
Bias Binding
I’ll start with where the bias cut is probably used the most in quilting – the bias binding. Bias binding is – you’ve guessed it – just a binding strip that was cut along the bias.
Instead of cutting straight grain binding strips running perpendicularly from one selvage to the other, you cut the strips at a 45-degree angle.
For regular rectangular and square-shaped quilts, this isn’t necessary, because the straight-grain binding strips work perfectly (and are much easier to make). But when dealing with curves, bias binding is pretty much your only option.
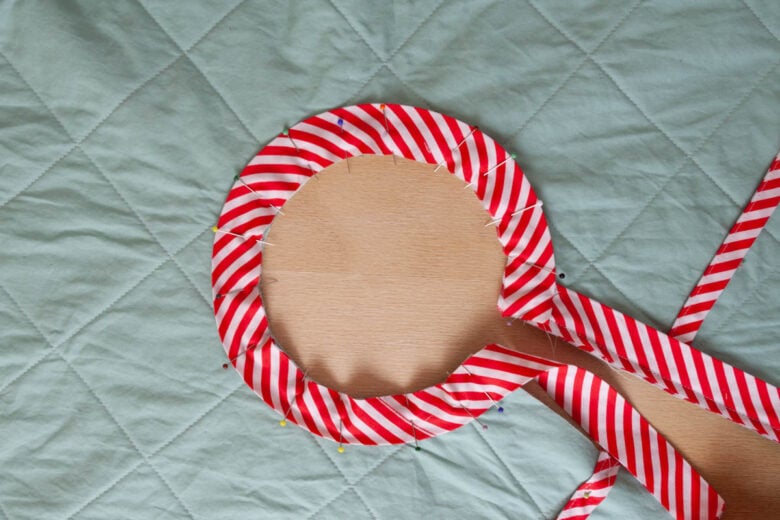
The stretch in the bias binding gives the strip a nice stretch that makes it much easier to sew the binding around curved edges, scalloped edges, or other irregular shapes.
A great example is this bias binding we used to bind the Gift Wrap Christmas Tree Skirt (available in the shop).


This sounds a bit complicated and honestly, it can be. Luckily, we have some great tips and some serious tricks that will make this whole thing a lot easier. You can read all about bias binding and how to make a bias binding strip in our dedicated bias binding tutorial.
Unwanted Bias Edges
As much as we love the stretchiness of the bias grain for binding curves and irregular shapes, there are also times when the bias is the bane of a quilter’s existence.
I’m talking about all instances where the pattern or block you’re making requires you to cut one or more edges along the bias.
This happens for example sometimes when making half-square triangles (specifically when using the 4-at-a-time HST method).
It also happens often when cutting setting triangles in ‘on point’ patterns. (These are patterns where the basic geometry is oriented diagonally.) A typical example is our Mirror Maze pattern (available in the shop), where you need to set background triangles in the middle on the left and right.

Tips for Working with Bias Edges
Working with blocks or pieces of fabric that have one or more bias edges can be a bit tricky. If not handled properly, the bias edges tend to stretch and distort. This can make it hard to match these blocks or fabric pieces to the other elements in your quilt top.
Now clever quilters like you and me know that there are times when bias edges can in fact be avoided. If you can do that, I suggest you do. For example, the 4-at-a-time half-square triangle method produces HSTs with biased edges. If possible, use a different HST construction method, where the resulting HSTs won’t have bias edges.
But basic geometry will tell you that in certain situations, there’s no workaround and it’s completely fine to work with bias edges when necessary.
I have some tips for working with bias edges that will help you keep those edges nice and distortion-free.
TIP 1: Starch before cutting
Full disclosure, we never starch and haven’t had any problems so far. However, many quilters swear by starching, especially when working with bias edges.
Starch adds stiffness and stability to the fabric, which means those bias edges are much less stretchy and therefore less prone to distortion.
TIP 2: Press, don’t iron
This is almost like a mantra for us quilters – press, don’t iron. Especially when dealing with bias edges!
Instead of dragging the iron left and right, just press the hot iron down. Then lift, reposition the iron, and press down again. This way you won’t unnecessarily stretch and open those fragile bias edges.
TIP 3: Handle with care and as little as possible
After the bias edges are cut (and pressed, if necessary) move them around as little as possible.
TIP 4: Pin before sewing
Especially when sewing longer bias edges, I recommend pinning them in place. This will prevent the edge from stretching as you guide it through the sewing machine.
And that’s it! I hope this article has helped you learn what cut on the bias means. And realize there’s nothing scary about working with bias edges.
If you’ve got any questions or tips for working with bias edges of your own, let us know in the comments below!


