Hey, dear Mirror Mazers! It’s the final week of the Mirror Maze quilt along and this week we’re assembling and squaring the quilt top!
Hopefully, all your tasks so far have gone to plan and you’re now admiring the beautiful HST rows you sewed last week. There’s just something about HSTs, don’t you agree?
In case you still need to catch up, make sure you read all our previous QAL blog posts to help you through all the steps:
Week 1: May 22, 2023 Choose fabrics and gather suppliesWeek 2: May 29, 2023 Cut fabricWeek 3: June 5, 2023 Sew HSTs and HST rows
Week 4: June 12, 2023 Assemble and square up the quilt top
For any and all questions we’re always happy to help. Here are your options:
- Ask in the comment section below
- Send us an email (hello@designedtoquilt.com)
- Get in touch on Instagram (@designedtoquilt)
And now if you’re all ready, let’s finish this quilt top!
Mirror Maze QAL Week 4 Assignments
This week, we have three final tasks:
- Assemble the quilt top
- Square up the quilt top
- Admire, adore, and love your quilt top (and plan on how to quilt and bind it)
Tools Needed
You’ll need all your basic quilting tools:
- Sewing machine
- Iron and ironing board
- Self-healing cutting mat
- Rotary cutter with a sharp (!) blade
- Quilting rulers
Assemble the Quilt Top
For the quilt top assembly, just follow the diagrams in the pattern (page 8 for both throw and crib size).
There’s really not much to add here. Unless perhaps to align the pieces along the dashed lines in the diagrams (as instructed in the pattern) and not to worry about how much overhang you get on the outer edges of these units. We’ll square everything up at the end! And don’t forget to press your seams!
Square Up the Quilt Top
Now all we have to do is square up the quilt top. There’s nothing scary about this, just go step by step and you should be fine!
Here are some tips that might help you make the cut:
TIP #1
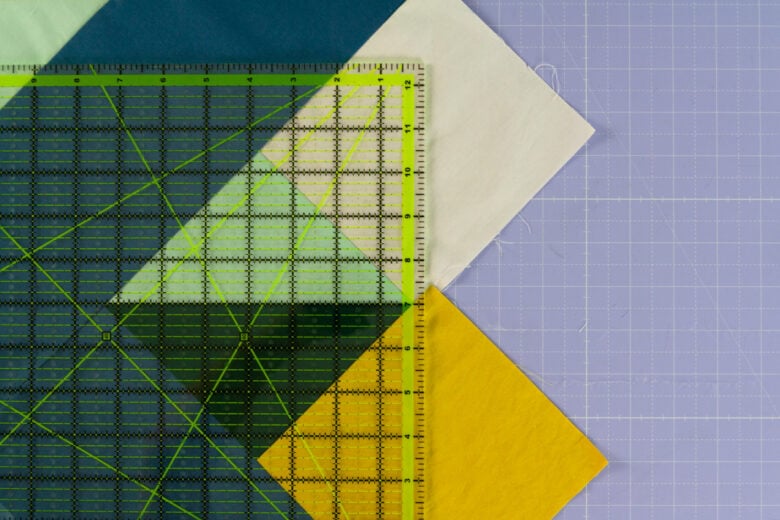
As illustrated on page 9 of the pattern, be careful to always cut ¼’’ away from the HST corners. This way, when you attach the binding, your HST point should be perfectly on the edge of the binding.
In the picture above you can see that we placed the ruler so the neon line is right on top of the HST corner. This way when we cut along the edge, the HST corner is exactly 1/4” from the edge of the quilt top.
TIP #2
Use the longest quitting rulers you have. We usually use our 6×24’’ ruler and our square 12,5’’ ruler.
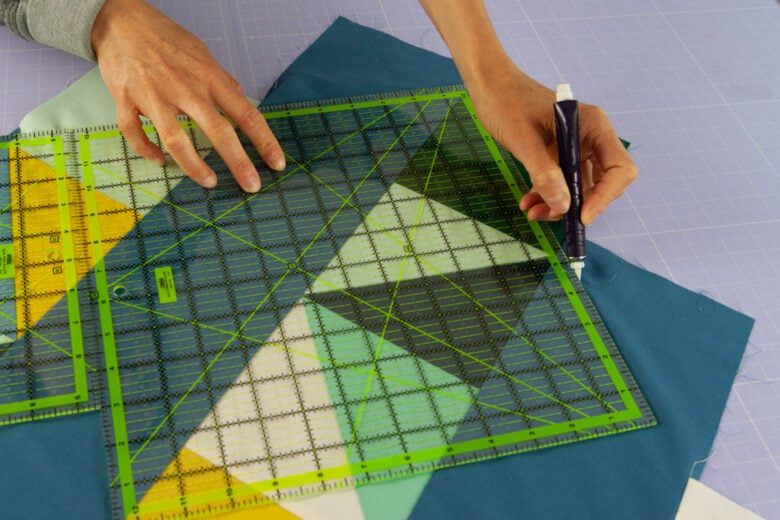
TIP #3
If you’re feeling brave, you can make cuts right as you go. Otherwise, I recommend marking the cut first with your favorite fabric marking pencil.
TIP #4
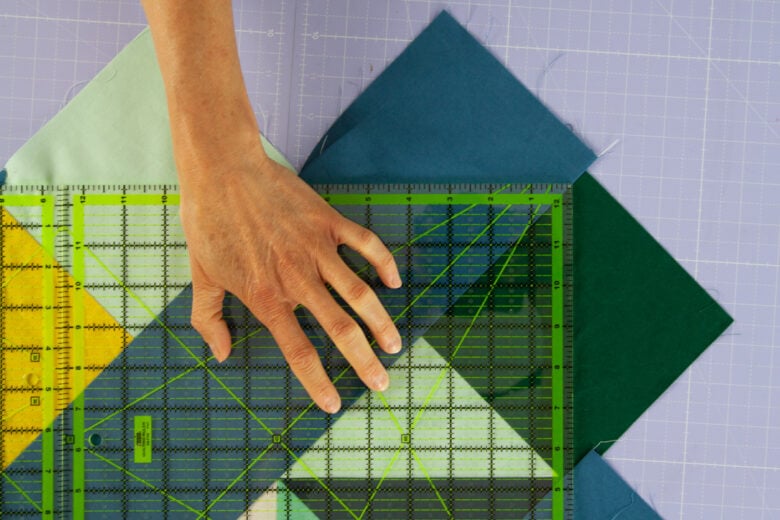
Use reference points to help you determine where to make the cuts:
- Always cut ¼’’ from the HST corners (as explained above): if you place the ¼’’ mark on your ruler over the HST corner, the edge of the ruler is right where you need to make the cut
- When reaching the corners, see that the corner of your quilting ruler lays right on the diagonal of the quilt top (the seam between the long HST row and the long background strip).
In the picture above you can see how we place our ruler using these reference points.
Keep in mind that these are your best-case scenario reference points. Sometimes if we’re a bit too quick to cut or sew, we can get not-so-perfect results. In our case, for example, two corners don’t fall on the diagonals. But that’s totally fine! After the quilt is finished no one will notice these tiny mistakes (not even you!).
With these tips in mind, make the cut and square up your quilt top!
And now, take a step back, and look what an amazing job you’ve done! We’re super proud of you!
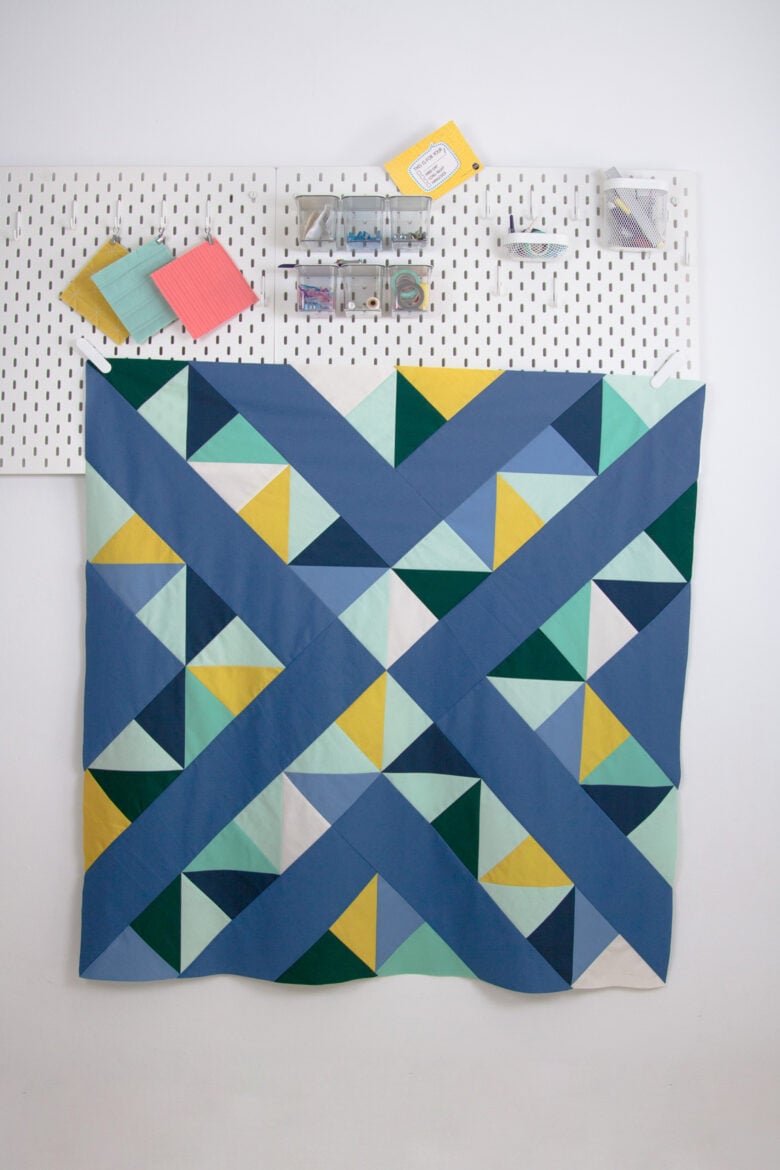
This is how ours turned out. We looove the color combo, don’t you? Yummy!
Finish Your Quilt
Of course, we don’t want your (or our) quilt top to end up as an unfinished flimsy in the UFO (unfinished object) pile somewhere. We want you to finish it all the way so you can love it like it deserves!
I’m not going to go into too much detail here, but in case you need any help, we’ve got tons of great resources on the blog that will help you finish your quilt:

Quilting Calculators
These are so useful! Calculate in seconds how to piece your backing, and how much fabric you need for backing, batting, and binding! Our calculators will do all the quilt math for you so you can focus on the more interesting things!
Step-by-step Tutorials
If you’re a new quilter or need a refresher, we also have many tutorials for all the different steps you need to take to finish your quilt. A great overview is our in-depth tutorial on How to Make a Quilt and here are some of our most popular articles on how to finish a quilt:
Baste: How to Baste a Quilt
Quilt: How to Machine Quilt + 11 Straight Line Quilting Designs
Bind: How to Make Binding + How to Bind a Quilt
Week 4 Conclusion
I almost can’t believe I’m writing this, but we’ve come to the end of the Mirror Maze quilt along. We’ve had so much fun sewing with you! And we’re truly honored you decided to take the time to sew with us.
Naturally, we want to see those Mirror Mazes! If you’re on Instagram, share pics of your quilt using #designedtoquilt and #mirrormazequilt! We can’t wait to see your quilts!

Finish Your Quilt Effortlessly
Quilt Geek calculates every measurement you need, so your quilt turns out perfect every time.
START YOUR 7-DAY TRIAL FOR $0!
Cancel anytime.


About The Author
Ula | Designed to Quilt