Hi there, fellow Mirror Maze explorer! It’s week 3 of the Mirror Maze quilt along and this week, we finally start sewing!
Believe it or not, we’re already halfway through the Mirror Maze quilt along! That’s because now that we’ve done all the hard work (aka cutting) things are going to come together unbelievably fast. And in two weeks, you’ll have your quilt top finished. Yaaay!
If you’ve got any questions about the assignments we covered in Week 1 or Week 2, or you feel uncertain about this week’s sewing, ask away. We’re here for you! You have plenty of options:
- Ask in the comment section below
- Send us an email (hello@designedtoquilt.com)
- Get in touch on Instagram (@designedtoquilt)
Quilt Along Schedule
For those of you who like to work on a schedule, here’s a quick overview of the QAL timeline:
Week 1: May 22, 2023 Choose fabrics and gather suppliesWeek 2: May 29, 2023 Cut fabric
Week 3: June 5, 2023 Sew HSTs and HST rows (we’re here right now)
Week 4: June 12, 2023 Assemble and square up the quilt top
If you’re late to the party and wanna play catch up click on the links above to get to the QAL posts for the previous weeks.
If all else is clear, I say let’s get sewing!
Mirror Maze QAL Week 3 Assignments
This is the week when we do what we’re all here for – sew. Because Mirror Maze is such a modular pattern, we really only have two assignments (but we’ll put those on repeat):
- Sew HSTs (half square triangles)
- Sew HST rows
Tools Needed
This week, you’ll need all your basic quilting tools:
- Sewing machine
- Iron and ironing board
- Self-healing cutting mat
- Rotary cutter with a sharp (!) blade
- Quilting rulers
Make the Half Square Triangles
Mirror Maze is an ode to half-square triangles – and the geometry of HSTs is actually what inspired the name. So there will be many of them. But fear not, with some tricks you’ll be an accurate HST-making machine by the end of this!

Half-Square Triangle Methods
Depending on the size and version you’re making, the pattern includes instructions for the most optimal method of making the HSTs:
- Limited color crib and throw: 8-at-a-time HST method
- Multi-color crib and throw: 2-at-a-time HST method
- Both versions of the pillow size: 4-at-a-time HST method
I won’t go into detail for each of the methods as they are explained extensively (and illustrated with diagrams) in the pattern. Instead, I will share some tips that will help you make perfect HSTs no matter which method you’re following.
Tips for Perfect HSTs
Here are my top tips for perfect HSTs:
TIP #1: Make sure you use a scant ¼’’ seam.
You’ll also see this note in the pattern because it’s really super important. The starting squares for all three methods are calculated to minimize waste. Therefore the dimensions are tight. If your seams are too wide, you will have problems when cutting the HSTs to the required size.
TIP #2: Do a test run before sewing everything!
To make sure your seams produce the required size HSTs, I strongly recommend doing a test run before sewing everything. This means you finish at least one HST with the given method all the way to the trimming BEFORE sewing all the starting squares together. This way, if you see that you have to adjust your seams, for example, you only have to fix that ONCE.
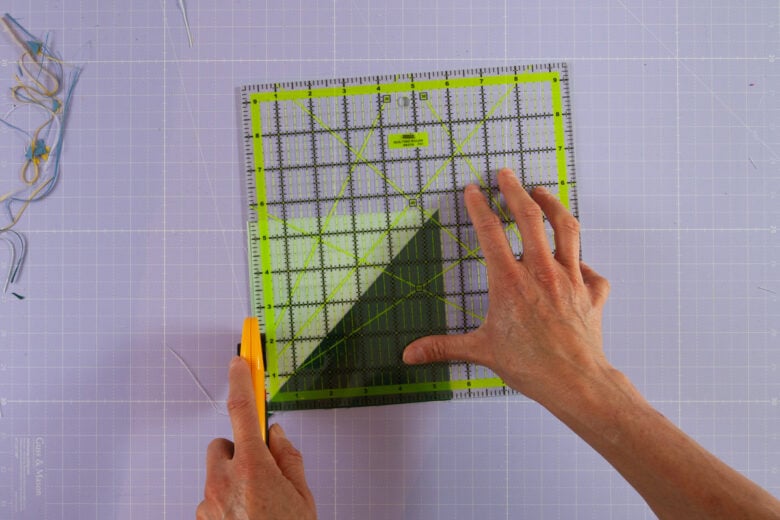
TIP #3: Open and press before trimming.
This is probably a personal preference, but we’ve learned that we get much more accurate HSTs if we trim them AFTER pressing. There’s some extra cutting involved (compared to trimming the HSTs closed) but we think it’s worth it. See the trimming diagram on page 7 of the Mirror Mate pattern for detailed instructions on trimming.
TIP #4: Be careful with bias edges (pillow only).
This last tip only applies to the pillow size. We use the 4-at-a-time HST method there, which produces HSTs with bias edges. These can be prone to stretching, so make sure you handle them carefully to keep them perfect.
Sew the HST Row Units
Now that we’ve got our HSTs sewn, pressed, and trimmed, it’s time to sew them into rows. This is pretty straightforward. You’re basically gonna sew together the HSTs and an additional rectangle (A2, B2, or mc2) for each row unit.
If making a limited-color quilt top, simply follow the diagrams in the pattern to create the different row units.
If making a multi-color quilt top, we recommend laying out your entire quilt top first and then playing with your HSTs a bit to see which layout you like best. We used our brand new quilt design wall for this (which we love and 100% recommend – see How to Make a Quilt Design Wall for more info).
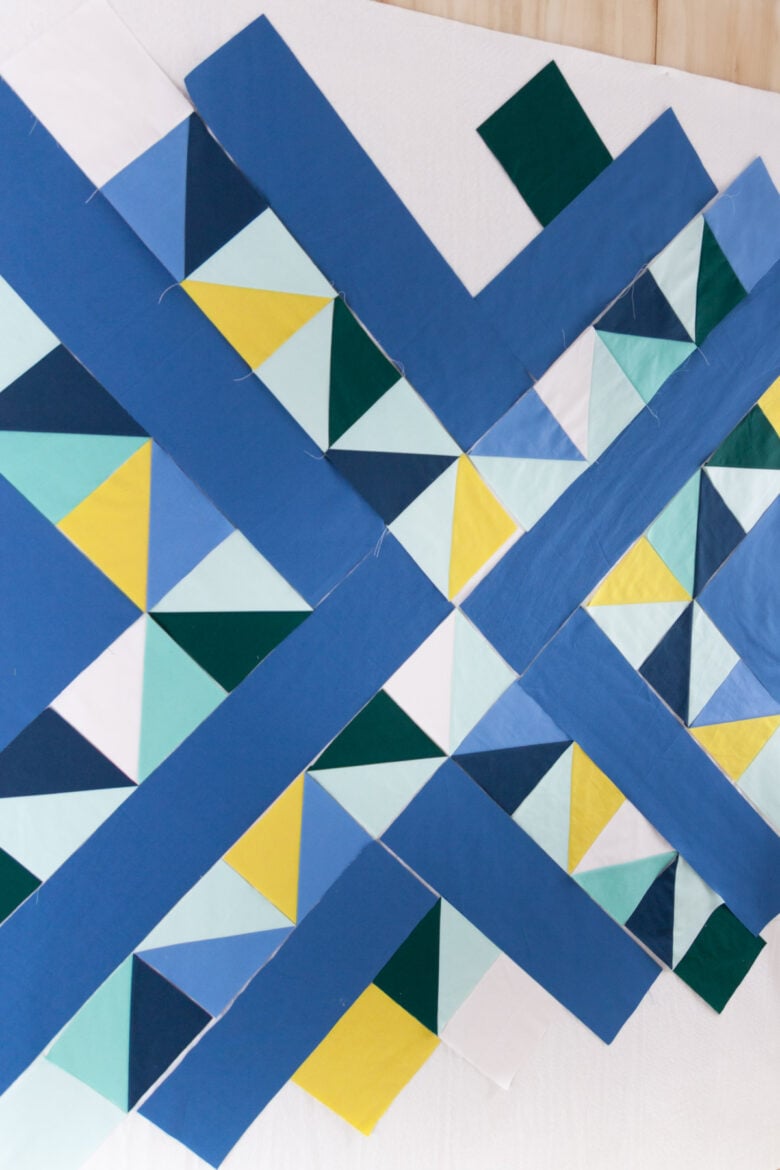
Once you’re happy with your layout, take out each row unit and sew it together. Refer to the diagram on page 12 for some visual aid.
Press all seams and you’re ready for Week 4!

Week 3 Conclusion
After you’ve sewn all the row units together, it’s time to give yourself a pat on the back. Well done! All that’s left for week 4 now is the final assembly and squaring up the top.
Happy sewing and we’ll speak to you soon!

Finish Your Quilt Effortlessly
Quilt Geek calculates every measurement you need, so your quilt turns out perfect every time.
START YOUR 7-DAY TRIAL FOR $0!
Cancel anytime.


About The Author
Ula | Designed to Quilt