Design a sewing room you will love with our sewing room ideas on a budget. Get inspired by the tricks we used in our quilting room!
If you’re looking for ideas on how to design your sewing room, you’ve come to the right place.
We’ve got some great sewing room ideas that you’ll love whether you’re designing your first sewing room or looking for ways to spruce up your current setup!
This post contains affiliate links. Learn more here.
- Sewing Room Ideas on a Budget
- 1 – Make the most of your sewing room layout
- 2 – DIY a Drop-In Sewing Machine Table
- 3 – Repurpose Old Dressers for Fabric Storage
- 4 – Use Curtain Wires to Display Blocks
- 5 – Use a Peg Board for Tools and Notions
- 6 – Use Clear Containers for Storage
- 7 – Make a DIY Design Wall
- 8 – Add Good Lighting
- 9 – Decorate with Inspirational Wall Art
- 10 – Make a Mini Quilt
- 11 – Make a DIY Cutting Table
Sewing Room Ideas on a Budget
We are originally architects, so having a sewing space that is not only functional but also inspirational is very important to us.
But we’re also quilters, so we want to save as much money as we can so we can spend it on fabric instead.
We’ve gathered some of our best sewing room ideas on a budget that we think you will love! These are the exact design ideas we used in our sewing room and they’ve been serving us really well.
You’ll see that we’re big Ikea fans, so lots of the ideas here use Ikea products. Of course, you don’t need to use the exact same products for your sewing room. Just take these as inspiration for what you can do!
Read on for some awesome sewing room ideas on a budget.
1 – Make the most of your sewing room layout
Before we go into the fun sewing room design ideas, you’ll want to make sure you’re making the most of your sewing room layout. You want your sewing room to be functional before anything else, so make sure you plan all your must-have work surfaces first so they serve you well.

There are three essential workspaces you absolutely must have – whether you’re looking for sewing room ideas on a budget or have the luxury of doing whatever your heart desires:
Space for your sewing machine
This is pretty obvious but you’ll want to dedicate a large workspace for your sewing machine. If you do a lot of machine quilting make sure the workspace is large enough to accommodate your entire quilt as you sew.
DTQ Tip: Unless you have space for a very large table surface, place your sewing machine up against a wall – especially for quilting. The wall stops the quilt from falling over the table, which prevents the weight of the quilt from dragging the quilt down.
If you have more than one sewing machine, consider either adding another table to the design or plan a space to store your machine(s) if you plan on switching them up.
Cutting space
Plan a dedicated space where you can cut your fabric, ideally somewhere close to the sewing area. You’ll need a large self-healing cutting mat to place on the surface. It’s a must for quilting but comes in handy for other sewing projects, as well.

We use a hacked Ikea utility cart as our cutting table. You can read more about it toward the end of this article.
An ironing space
In our sewing studio, we use an ironing board we inherited from our Mom (thanks, Mom!). It does what it needs to, so if you have enough space for an ironing board, it’s a great (and cheap) option.

Another option is a Wool pressing mat which lots of quilters love! You can place it on any kind of surface. It not only protects the surface but also radiates the heat back to the fabric you’re pressing, so it’s a double win!
DTQ TIP: If possible, plan your ironing space close to the sewing machine. This way you won’t need to move around your room too much when pressing your blocks during sewing.
2 – DIY a Drop-In Sewing Machine Table
A drop-in sewing machine table is a table that has a recessed or lowered surface, into which the machine is inserted. This creates a large flush sewing surface which is a dream to work on!
If you sew frequently, I know you will love to have a drop-in sewing machine table. Sure, you can buy a special quilting cabinet (like this Christa Quilting Cabinet, for example) – and if you can afford it, go for it! They look pretty incredible. But we’re talking about sewing room ideas on a budget here.
If you want to save some serious $$$ it IS possible to DIY one. Of course, this will require some woodworking skills, but if you have a handy significant other or friend, perhaps they’d be willing to make one for you!

My husband made ours using an old office desk underframe (which was actually someone’s garbage, so talk about a good deal!). We used beech plywood cut to size as the tabletop. He measured my sewing machine and created an opening on the tabletop. Then, he constructed a lowered surface that supports the machine.
Here are some more pics for you to see how it’s constructed.
The basic idea was to create a lowered surface on which the sewing machine rests. The surface is lowered just enough to have the throat plate perfectly flush with the top of the table.
He created this lowered surface by building a plywood frame and attaching it to the tabletop. You can see it here:


The opening on the tabletop is a bit more custom. He cut out the exact shape of the sewing machine (so it wouldn’t be possible to fit in a different machine brand or even model).
If you’d want to avoid making this complicated opening, you could buy an extension table for your sewing machine (just make sure you choose one that fits your exact model). And then make the opening fit the extension table, rather than the actual sewing machine.
You can see that the opening is longer than the sewing machine – that extra opening enables us to slide in the sewing machine from right to left. (See the picture above, where Barbara is sliding in the machine.)


I love how we can simply slide the machine into the opening and get this amazing large surface to work on. I really only take the machine out for maintenance, otherwise it stays in place at all times.
3 – Repurpose Old Dressers for Fabric Storage
We’re talking about sewing room ideas on a budget here, so we can’t go past some thrifty hacks.
A great way to save some cash when designing your sewing room is to repurpose old furniture you might already own. Secondhand furniture is also great – try the Facebook marketplace to find some great deals.

In our sewing studio, we have two of these Ikea Malm dressers with four drawers each that I used to have in my bedroom. We use them for fabric storage and we love that we can organize the fabrics. We keep smaller pieces in the top drawer and larger yardage cuts underneath. We keep backing fabrics (prints) in one drawer separately.

We also have a drawer reserved for batting scraps, which then get used for frankenbatting or smaller quilt projects.
We currently just keep the fabrics in small piles (organized by colors) in the drawers. This is kind of what works best for our process. We tend to pull everything out and play with the colors and pieces. So no – it is definitely not this organized all the time. Barbara works her organizing magic every once in a while and creates this incredible rainbow of colors you see in the pics.
4 – Use Curtain Wires to Display Blocks
We love love love our block display. We created it using the Ikea Dignitet curtain wire and Riktig curtain hooks. It’s such a fun way to add some (more) fabric to the sewing room decor.

We have a kind of permanent display of quilting samples we created for the straight-line quilting design ideas tutorial.
On the top wire, we hang different blocks that come together in the studio and aren’t necessarily part of a whole quilt project. But we love looking at them from our computer desks (which is where we spend a lot of our time).
The best part is these curtain wires are pretty cheap, so this definitely fits the ‘sewing room ideas on a budget’ list.
5 – Use a Peg Board for Tools and Notions
What’s the point of having all those tools and notions if you’re out of reach when you need them?

The best way we’ve found to keep all our supplies handy is by storing them on peg boards. We have two Ikea Skadis peg boards where we keep all our tools and notions that we need for all the basic sewing and quilting tasks. We use them to hang our quilting rulers, our fabric scissors, rotary cutters, and all other small tools and notions we couldn’t live without.
It’s super functional and it also works as some kind of quilting wall art. And if you’re looking for sewing room ideas on a budget, this one is a definite winner!
6 – Use Clear Containers for Storage
Whether you have containers attached to your pegboard, like we do, or keep them on open shelves, clear organizers are the best for storing all sorts of things in the sewing room!

Use these small peg board containers for clips, pins, and other small notions.
Or look for large plastic containers for your shelves and open storage. Measure the space you have and try to find a size that will make the best use of it. I really like these plastic containers – they have lids which I think is a must! No one likes dust in their fabrics and notions!
7 – Make a DIY Design Wall
While a quilt design wall is not 100% necessary, it will make your quilting life 100% easier! If you have a large surface that you can dedicate to a permanent quilt design wall, it is definitely something you won’t regret doing.

Read our tutorial on how to make a quilt design wall in 3 steps. We discuss everything from what materials to use, how to attach the design wall to your chosen surface, and how to make it step by step.
You’ll be surprised by how easy it is to make – and how cheap! Definitely one of the best (and most useful) sewing room ideas on a budget!
8 – Add Good Lighting
Whether you’re a daytime sewer or a night owl, you need good lighting in your sewing room. When planning lighting, think about it on two levels: general lighting and task lighting.
General lighting is made up of all the light sources in your sewing room, both natural and artificial. This is what you probably have in your sewing room – usually a ceiling light or two and of course, the natural light coming from the windows.
Task lighting is the lighting you use when you perform specific tasks – cutting, sewing, unstitching, etc.

For this, we really like these clamp spotlights. They look great and most importantly – couldn’t be easier to install. We got ours – again – at Ikea, but there are so many great options on the market.
9 – Decorate with Inspirational Wall Art
If you’re looking for sewing room ideas on a budget, you’re going to love these fun posters – because they’re free!

Add some fun quilty wall art to your sewing room. We created these DTQ quilting quotes wall art you can use. To get them you simply have to sign up for our newsletter and we’ll send them right into your inbox. How cute are they?
10 – Make a Mini Quilt
Of course, there’s no better way to decorate your quilting room than with a mini quilt wall hanging. There are so many great patterns out there.
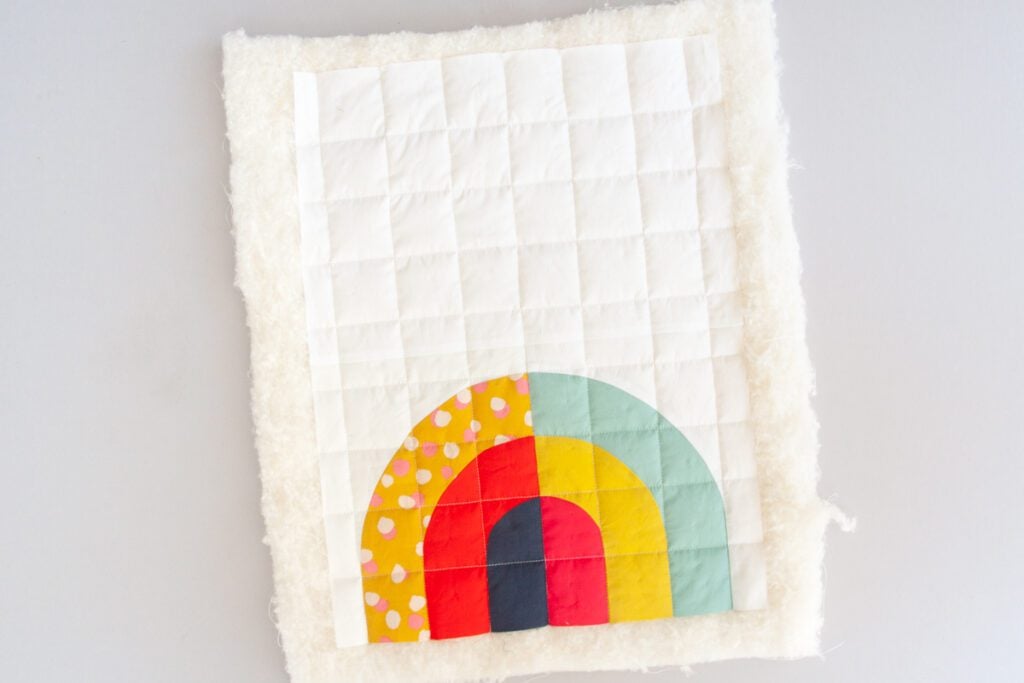
If you like rainbows, like I do, you can make a quilted rainbow wall art. It’s a great project to try curves (they’re not as scary as they look) and it’s such a fun addition to any room!
11 – Make a DIY Cutting Table
I’ve been saving the best for last. This is one of the best design ideas we used in our sewing room. It is super functional AND it didn’t cost us a fortune.

We created a large cutting table using an Ikea Bror utility cart. All we did was add a large beech plywood surface on top. My husband screwed it onto the original Bror table top (which is also plywood, so this wasn’t hard to do).
What we love most about it is that it’s on wheels. Our studio is not very big, so we have to move the cutting table to get good lighting for photographing quilts, etc.
When it’s in use for cutting, we put the wheel brakes on and it’s super sturdy and stays in place.
These are our best sewing room ideas on a budget – we hope you love them as much as we do!
Do you have any tricks or tips for what’s worked well in your sewing space? We’d love to hear about it in the comments below!

Finish Your Quilt Effortlessly
Quilt Geek calculates every measurement you need, so your quilt turns out perfect every time.
START YOUR 7-DAY TRIAL FOR $0!
Cancel anytime.


I’d love to see a more detailed tutorial on the inlaid sewing machine diy table! Especially some pictures of the lowered surface the machine sits on.
Sure, Megan, we’ll take some pics and add them here in the next week or so. I don’t want you waiting for the whole tutorial, because that might take a bit longer 🤣 But it’s on the list!
Me too!
Hi, I’m in the process of setting up a quilting room and your tips are very helpful. Thanks! I’m curious what the plywood dimensions are for the DIY cutting table.
Hi, thanks so much for your comment. We measured the cutting surface and it’s 55×40 inches. We love it still, we find it’s the perfect size and it’s super versatile.