Learn how to wash a quilt without damaging it. Read our hand-washing quilt tips and learn how to safely machine wash a quilt. Drying instructions included!
Washing a handmade quilt doesn’t have to be intimidating. OK, it will always be a little bit intimidating. But if you follow some basic quilt-washing tips, there’s a good chance your quilt will come out of it just fine. (How reassuring is that haha?)
How to wash a quilt the right way?
We’ve searched the internet (and learned from trial and error) to give you the best techniques to wash a handmade quilt. Whether they are hand-sewn or machine sewn, there’s a way to wash them that will keep them nice and beautiful for a long time.
Before I go into details on how to wash a quilt, let me add a little disclaimer here. The washing instructions are written for materials that are usually used in quilt making. So if you’re dealing with some super delicate quilt top or backing fabric, or you’re unsure of what batting material is used in the quilt, leave the washing to a professional. Ideally, find someone who is experienced in washing quilts.
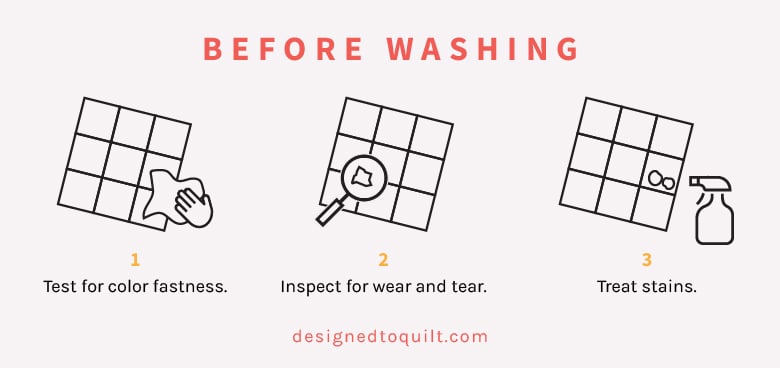
Before washing a quilt
Before you actually submerge your quilt in water and hope for the best, there are a few things to consider. First and foremost, decide how often to wash your quilt. And also, make sure your quilt is washing-ready.
How often should you wash quilts?
I know I’ve just said that washing quilts is A-OK, but I still don’t recommend doing it too often. I would actually say it’s best to wash them as seldom as possible.
If you manage to keep your quilts fairly clean (i.e. without visible stains), washing your quilts once or twice a year should suffice. Maybe just air them out every once in a while to keep them fresh.
Unfortunately, some of us are physically unable to keep our quilts clean. I’d blame my kids, but there has been more than one coffee spill situation in my past. In this case, wash when needed.
Test the quilt for colorfastness
One of the biggest concerns when washing a quilt is color bleeding. Color bleeding occurs when (usually darker) fabric gets wet and dye is extracted from its fiber and transferred onto brighter fabric. It is often very hard, if not impossible to completely remove the color that has bled onto brighter fabric.
To test if the colors on your quilt won’t bleed, take a white cloth, wet it, and gently rub it over different fabrics on your quilt. If the cloth remains white, you’re good to go. However, if color rubs off onto the cloth, it is probably best to avoid washing the quilt, as you might have to deal with a catastrophe. If you’re adamant about washing at home, I recommend going the hand-washing route and being super gentle. Otherwise, I’d leave this one to a professional.
In the future, consider using better quality fabric, as color bleeding most often happens with cheaper fabrics. The dyes used in the production of cheaper fabrics are often of lower quality. I haven’t had a real color bleeding experience and I contribute that mostly to the fabrics I choose to make my quilts.
Inspect your quilt for wear and tear
Always inspect the quilt before throwing it in the machine or bathtub. Check if all seams are secure and if there are any minor repairs needed. It’s much easier to make these little fixes before the quilt is washed. Washing might cause unsecure seams to unravel and tiny fabric holes to open up. So save yourself a headache and go over the quilt to make sure everything is OK.
Treat stains
If you’re like me, meaning you know life is for living and coffee spills will happen, you might want to pre-treat the stains before actually washing the quilt.
I use a gentle stain remover for baby clothes, but you can use any commercial stain remover. If you’re nervous about it damaging your quilt recommend doing a test on a tiny area first.
How to Wash a Quilt tutorial
Depending on what type of quilt you’re dealing with (and how much time you’re willing to spend washing) you have two options: machine washing and hand washing.
As a general rule, you should hand wash all your hand-pieced and/or hand-quilted quilts. Also, keep the washing machine away from all vintage quilts (or vintage quilts away from the washing machine). They tend to be more fragile and it’s best to treat them super gently like only you can 🙂
For quilts that are machine-sewn, machine washing is fine. As long as you make sure to use a gentle cycle and low temperature. There are also some other tricks you can use to make sure your quilt comes out of the wash perfectly. But more on that in the how-to below.
How to Hand wash a quilt?
Hand washing is absolutely the safest method to wash your quilts. It takes some extra time, but considering how long it takes you to make a quilt, it is well worth it. Here’s a cute infographic to give you the basic idea, followed by an in-depth hand washing guide.

Equipment and materials for hand washing a quilt:
- A large laundry tub, sink, or bathtub
- Drying rack
- Mild liquid laundry detergent
- Distilled white vinegar
- A white bedsheet
- Large Bath towels for drying
Hand washing a Quilt Step by Step
Step 1: Fill up the tub
Make sure the tub you’ll be using is completely clean. Fill the tub with cold water and add a gentle liquid detergent. (Look for a dye-free, perfume-free liquid detergent as powdered detergent can leave residue on your quilt.)
Step 2: Soak the quilt
Submerge the quilt into the soapy water. Agitate the quilt gently to help remove any dirt. Soak the quilt for about 10 minutes.
Step 3: Rinse the quilt
Drain the soapy water from the tub (leaving the quilt inside). Fill the tub again with fresh water. This time, add 1/2 cup distilled white vinegar. This will help remove detergent residue and keep the quilt soft and the colors bright. Agitate the quilt for a bit and again, drain the water from the tub.
Repeat this process (without adding the vinegar) until you feel like there’s no more detergent in the quilt.
Step 4: Air dry the quilt
If you took the time to hand wash the quilt, I recommend drying it machine-free, as well. When hand washing, the quilt absorbs a lot of water and there is no spin cycle to get it out. This means the washed quilt is usually very heavy at first.
To start the air drying process, create a mini ‘hammock’ out of a clean white bed sheet and secure it above the tub or outside, if possible. Place the quilt inside the hammock and let it drip. You can gently squeeze the quilt to remove excess water (do not twist to prevent distortion). Leave the quilt in the hammock for a while.
After the dripping has stopped, you can air dry the quilt completely as described in the drying instructions below.
How to machine wash a quilt?
You can absolutely wash your quilt in a washing machine. Honestly, I almost exclusively wash my quilts in a washing machine and I’ve never had any real trouble. So I say go for it, but make sure you take some precautions, as described below.

Equipment and materials for machine washing a quilt:
- Washing machine
- Gentle dye-free and fragrance-free detergent
- Washing machine
Machine Washing a Quilt Step by Step
Step 1: Load the washing machine
Place the quilt inside the washing machine. I recommend putting the quilt in the washing machine by itself, especially if this is your first time washing it.
Step 2: Add color catchers
Add some color catchers to prevent color bleeding. The color catchers will catch the excess dye and prevent it from discoloring your quilt.
Step 3: Add detergent and start the washing machine
Add a gentle dye-free and fragrance-free detergent. Set the washing machine to a gentle cycle and low temperature.
Step 4: Air dry or tumble dry
After the machine is done washing, air dry your quilt or tumble dry it. Read the drying instructions below for more details.
How to dry a quilt?
The first rule of quilt drying is to never hang it vertically on a clothesline. The weight of the quilt can put stress on the seams, cause clumping of the batting, and distort the quilt completely.
So now that we know what we shouldn’t do to dry our quilts, let’s see what our options are. The probably safer option is, of course, air drying. However, tumble drying is also a great option, if you follow some general rules.
Much like with washing the decision whether to air dry or tumble dry will come down to what kind of quilt you’re dealing with. For fragile vintage hand-sewn, hand-appliqued, hand-quilted quilts, I’d go the air-drying route. (Generally, if you decided to hand wash, I’d use the old-school method for drying, as well.) For machine-sewn quilts, tumble drying is fine and will not damage your quilt, if done with some precautions.
How to air-dry a quilt?
If you choose to air dry your quilts, always dry them horizontally.
Lay down some heavy towels on the floor (make sure it’s water-proof flooring, as the water inside the quilt can damage some flooring like hardwood). Lay the quilt on top and cover it with more towels. Roll up this towel-quilt sandwich so the towels absorb more water.
Then, lay down some fresh dry towels and place the quilt on top. Leave to air dry. This can take up to several days, depending on the air temperature and humidity.
Can you put a quilt in the tumble dryer?
Yes, you can also dry your quilt in the drying machine. Just make sure you use extremely low heat. In fact, some quilters say that tumble-drying quilts make them extra soft and cuddly.
To prevent any damage, instead of drying it completely, dry it until damp. Then let it air dry to complete the drying process.
I think we’ve covered everything you need to know to wash your quilts effectively and safely. Is there any other tip you think we should all know when washing our quilts? Let us know below!
How to Wash a Quilt FAQs

Finish Your Quilt Effortlessly
Quilt Geek calculates every measurement you need, so your quilt turns out perfect every time.
START YOUR 7-DAY TRIAL FOR $0!
Cancel anytime.


About The Author
Ula | Designed to Quilt